
If you play Lineage 2 Essence, sooner or later you are going to hear names like Transcendent Instance Zones, Training Zone, Labyrinth of Kastia, Dream Dungeon, Clan Arena, Dwelling of Spirits, Frintezza, or Fafurion. The problem is that many players enter this content without really understanding what they are doing, what each instance is for, or which one they should prioritize depending on their progression.
And no, that is not your fault. Essence mixes solo content, party content, clan content, command channel raids, resets, missions, and rewards in a system that can feel like complete chaos if nobody explains it properly.
In this guide, you will understand what instances are, how they are divided, which ones are useful for experience, which ones are useful for farming, which ones require organization, and which ones you should only attempt if you have a group, a clan, or enough power to complete them.
Important: this guide is focused on Lineage 2 Essence. Some mechanics, names, rewards, entries, or availability may vary depending on the official version, region, or private server where you play.
You can also watch the related video.
Table of Contents
What is an instance in Lineage 2 Essence?
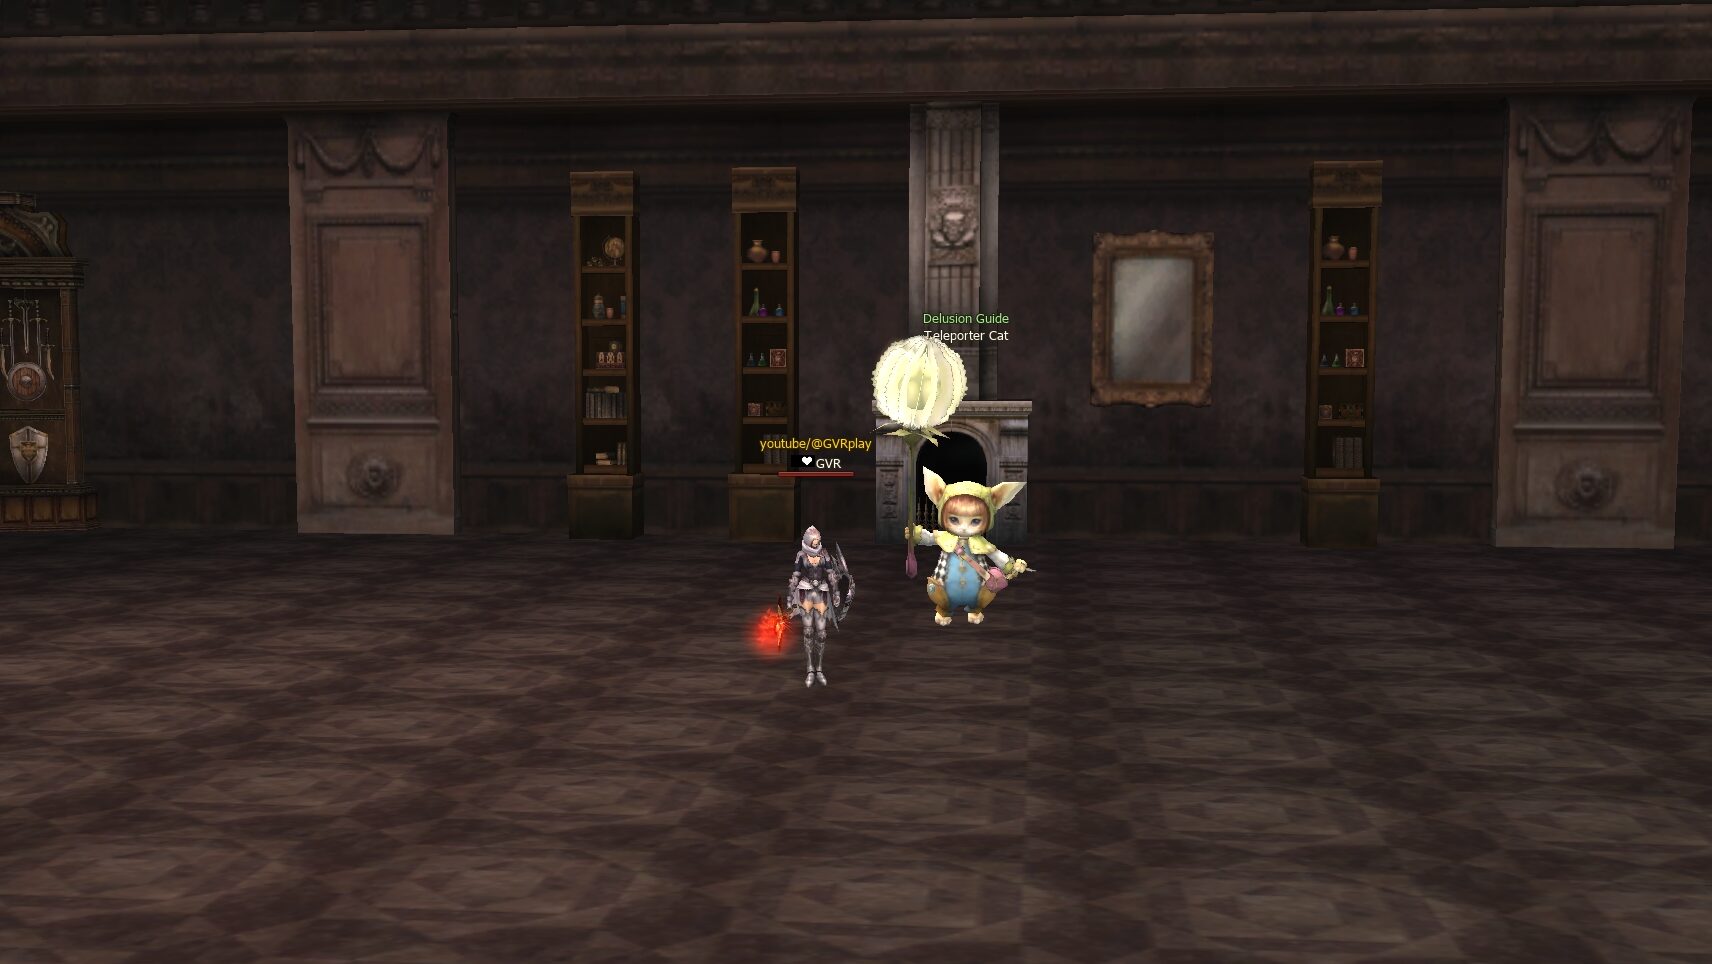
An instance in Lineage 2 Essence is a closed zone separated from the open world. You enter alone, with your party, with your clan, or with a command channel to complete a specific type of content.
You are not farming in the open world, you are not directly competing with every player on the server, and you usually enter to gain experience, progression, resources, specific rewards, or tradeable drops.
Most instances have a daily or weekly reset, and many of them share cooldowns. This means that if you enter one instance, you may not be able to enter another one until its duration ends or until the system allows entry again.
That is why simply memorizing instance names is not enough. What matters is understanding how they are organized and when each one is worth doing.
Types of instances
To understand them without losing your mind, we can divide instances into three main groups:
| Type | Main content | Who it is for |
|---|---|---|
| Solo instances | Transcendent Instance Zones, Training Zone, Labyrinth of Kastia if available | Players progressing alone, avoiding PvP, or not always depending on a party |
| Party instances | Dream Dungeon, Party Training | Players with a small party or organized group |
| Clan or raid instances | Clan Arena, Dwelling of Spirits, Frintezza, Fafurion | Clans, command channels, and large coordinated groups |
Do not confuse these instances with regular Special Zones for farming. Some entries may appear in related menus, but not everything in Special Zones works the same way. Farming Special Zones deserve their own separate guide.
Solo instances
Solo instances are especially important for players who do not always have a fixed party, an active clan, or enough time to organize group content.
This type of content is usually useful for gaining experience, farming more comfortably, avoiding PvP, using daily entries, and progressing without relying on other players.
You will not progress the same way as a competitive, well-organized clan. Obviously. But you still have very useful tools to keep growing on your own.
Transcendent Instance Zones
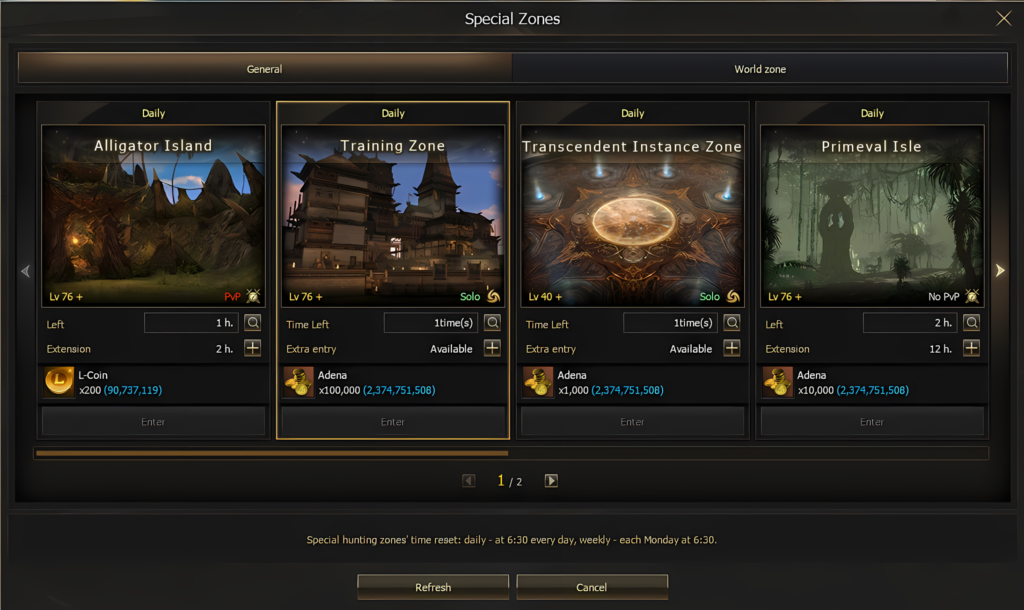
Transcendent Instance Zones are solo instances focused mainly on experience and SP. You enter through the Special Zones menu, and only one character can enter.
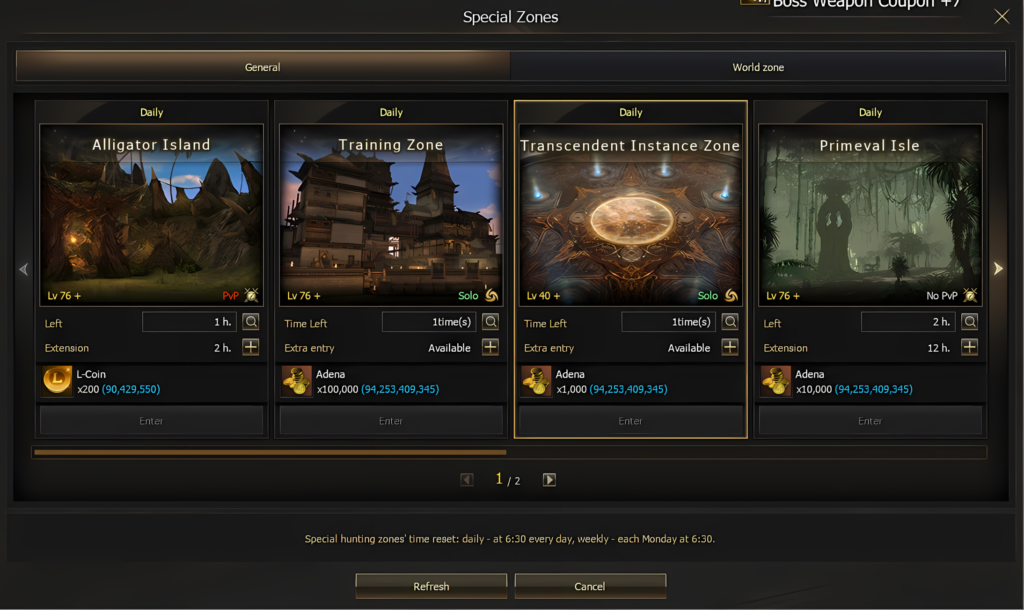
The duration is 10 minutes. Depending on your level, a higher-difficulty zone with better experience rewards becomes available.
| Zone | Level | Entry cost |
|---|---|---|
| Sea of Spores | 40-49 | 100 adena |
| Cemetery | 50-59 | 1,000 adena |
| Plains of Glory | 60-69 | 10,000 adena |
| War-Torn Plains | 70-79 | 100,000 adena |
| Dragon Valley | 80-99 | 200,000 adena |
| Sel Mahum Base | 85-99 | 500,000 adena |
When you enter, monsters do not appear immediately. First, you must speak with the Grand Master. This NPC gives you the Grand Master’s Transcendent Blessing buff, and that is when the 10-minute timer begins.
Once you receive the buff, waves of monsters start appearing. Also, some of your main skills turn into transcendent versions. You will recognize them because they appear with a yellow frame.
My recommendation is simple: use those transcendent skills. They do not consume MP and they deal area damage, so they are the key to making the most out of the instance.
| Zone | Transcendent Guardian |
|---|---|
| Sea of Spores | Poison Guard |
| Cemetery | Grave Warden |
| Plains of Glory | Guard of Honor |
| War-Torn Plains | Fierce Guard |
| Dragon Valley | Dragon Warden |
| Sel Mahum Base | Kura |
During the instance, a Transcendent Guardian may appear. If it appears, the system displays a notification. Killing it gives a good amount of experience and SP, so it is worth prioritizing.
If you die inside, you do not lose experience. Also, if you leave because you died, you have 3 minutes to re-enter for free. Even so, do not get careless: the instance only lasts 10 minutes, and the timer cannot be paused or extended.
Before entering, make sure you have buffs, scrolls, shots, and everything else ready. Entering badly prepared into a 10-minute instance is basically throwing away progression.
Related quest
There is a low-level quest related to these zones called To Get Incredible Power. It is given by High Priest Orven in Aden and requires level 45 or higher.

| Quest | Objective | Reward |
|---|---|---|
| To Get Incredible Power | Defeat 100 monsters in any Transcendent Instance Zone | 20,000,000 XP, 540,000 SP, Sayha’s Gust x9 |
There is also a daily mission related to these zones. If your server has it available, it is worth completing every day.
On some servers or during some events, you can obtain Extra Pass: Transcendent Instance Zone, which allows you to repeat the instance.
Training Zone
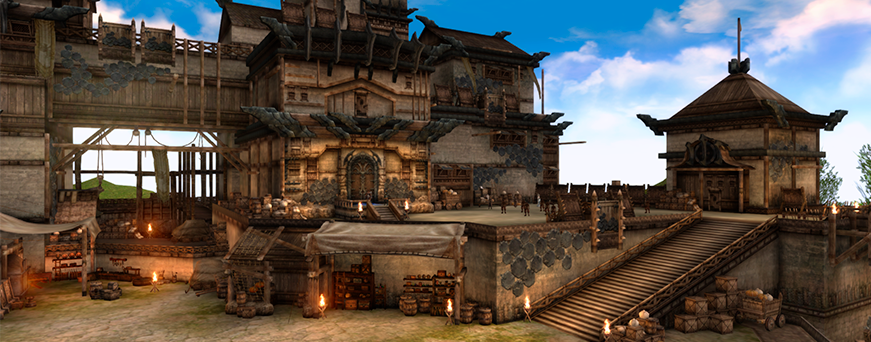
Training Zone is a solo time-limited instance where you can choose what type of monsters you want to summon and farm inside a safe zone.
| Element | Information |
|---|---|
| Content type | Solo instance |
| Entry | Special Hunting Zones |
| Required level | 76+ |
| Entry cost | 100,000 adena |
| Duration | 60 minutes |
| Daily entry | 1 |
| Repeat entry | Extra Pass: Training Zone |
| Sayha’s Grace | Not consumed inside |
| Boss | Appears 10 minutes before the end |
| Early exit | Scroll of Escape |
When you enter, you must choose which zone you want to do. In the official version, options may include Plains of the Lizardmen, Sel Mahum Base, Orc Barracks, and different floors of the Tower of Insolence.
Upon entering, you must choose which area you want to explore. In the official version, options such as Plains of the Lizardmen, Sel Mahum Base, Orc Barracks, and Tower of Insolence may appear on different floors.
The key point of Training Zone is that you do not enter a fixed zone: you decide what kind of hunting you want to do. On some servers, the NPCs may have different names, such as Training Mentor, Grown, Tind, Toka, or Eri, but the general logic is the same: choose zone, take buff, enter to farm, and make the most out of the time.
Offensive buffs in Training Zone
| Buff | Effect |
|---|---|
| Mentor’s Advice | P. Atk. +1000 |
| Mentor’s Advice | M. Atk. +1000 |
| Mentor’s Advice | Atk. Spd. +24% |
| Mentor’s Advice | Casting Spd. +24% |
| Mentor’s Advice | P. Skill Critical Rate +11% |
| Mentor’s Advice | M. Skill Critical Rate +21% |
| Mentor’s Advice | All Critical Damage +500 |
| Mentor’s Advice | Soulshot / Spiritshot Damage +10% |
| Mentor’s Advice | Skill Power +10% |
| Mentor’s Advice | All Critical Damage +15% |
| Mentor’s Advice | Absorbs 3% of damage dealt as MP |
| Mentor’s Advice | Absorbs 8% of damage dealt as HP |
Defensive buffs in Training Zone
| Buff | Effect |
|---|---|
| Mentor’s Advice | P. Def. +1000 |
| Mentor’s Advice | M. Def. +1000 |
| Mentor’s Advice | Max HP / MP +33% |
| Mentor’s Advice | Speed +12 |
| Mentor’s Advice | All received Critical Damage -15% |
| Mentor’s Advice | All received Critical Damage -300 |
| Mentor’s Advice | Received PvE Damage -10% |
| Mentor’s Advice | HP Recovery Potions’ Effect +100% |
The logic for choosing buffs is very simple. If your character kills well and survives well, prioritize damage. In Essence, skill damage matters a lot, so Skill Power and Soulshot Damage are usually very strong options.
After that, you can choose Critical Damage if you want more burst, or HP absorption if you need more sustain while farming.
But if you enter a zone where the mobs are destroying you, do not let your ego play the game for you. Sometimes a defensive buff or vampiric effect lets you complete the instance better than going full damage and ending up on the floor.
Remember that these buffs disappear when you leave Training Zone. They are not permanent buffs, and they are not meant for going out to PvP afterward. They are there to help you make the most out of that hour inside the instance.
Training Zone bosses
Training Zone also has bosses. The boss appears when there are 10 minutes left before the instance ends, and it depends on the zone you chose.
| Chosen zone | Boss |
|---|---|
| Plains of the Lizardmen | Boochoodu / Boojudu |
| Sel Mahum Base | Petron |
| Orc Barracks, Kerr’s Barracks | Kerrion / Kerion |
| Orc Barracks, Turek’s Barracks | Furious Toohack / Furious Tukhak |
| TOI floors 1-4 | Terror of Insolence Reelva / Rilva |
| TOI floors 5-9 | Abyss of Insolence Ryon / Ryun |
| TOI floors 10-12 | Guardian of Insolence Chel |
The higher the zone, the more interesting the drop can be. That is why Training Zone is not only about farming anything for one hour: it also matters where you are when the boss appears.
| Chosen zone | Possible drops |
|---|---|
| Plains of the Lizardmen | Sayha’s Blessing Pouch, Aden’s Soul Crystal Lv. 1 – Weapon, Aden’s Soul Crystal Lv. 1 – Armor, Sayha’s Grace Scroll |
| Sel Mahum Base | Sayha’s Blessing Pouch, Aden’s Soul Crystal Lv. 1 – Weapon, Aden’s Soul Crystal Lv. 1 – Armor, Hardin’s Soul Crystal Lv. 1, Sayha’s Grace Scroll |
| Orc Barracks, Kerr’s Barracks | Sayha’s Blessing Pouch, Aden’s Soul Crystal Lv. 1 / Lv. 5 – Weapon, Aden’s Soul Crystal Lv. 1 / Lv. 5 – Armor, Hardin’s Soul Crystal Lv. 1, Sayha’s Grace Scroll |
| Orc Barracks, Turek’s Barracks | Sayha’s Blessing Pouch, Aden’s Soul Crystal Lv. 1 / Lv. 5 – Weapon, Aden’s Soul Crystal Lv. 1 / Lv. 5 – Armor, Hardin’s Soul Crystal Lv. 1 / Lv. 5, Sayha’s Grace Scroll |
| TOI floors 1-4 | Sayha’s Blessing Pouch, Aden’s Soul Crystal Lv. 1, Aden’s Soul Crystal Lv. 1 – Armor, Sayha’s Grace Scroll |
| TOI floors 5-9 | Sayha’s Blessing Pouch, Aden’s Soul Crystal Lv. 1, Aden’s Soul Crystal Lv. 5, Aden’s Soul Crystal Lv. 1 – Armor, Aden’s Soul Crystal Lv. 5 – Armor, Hardin’s Soul Crystal Lv. 1, Hardin’s Soul Crystal Lv. 5, Sayha’s Grace Scroll |
| TOI floors 10-12 | Sayha’s Blessing Pouch, Aden’s Soul Crystal Lv. 1, Aden’s Soul Crystal Lv. 5, Aden’s Soul Crystal Lv. 10, Aden’s Soul Crystal Lv. 1 – Armor, Aden’s Soul Crystal Lv. 5 – Armor, Aden’s Soul Crystal Lv. 10 – Armor, Hardin’s Soul Crystal Lv. 1, Hardin’s Soul Crystal Lv. 5, Hardin’s Soul Crystal Lv. 10, Sayha’s Grace Scroll |
GVR tip for Training Zone
One of the most useful tricks in Training Zone is taking advantage of the fact that you can change zones. You can farm in a comfortable zone for most of the instance and then switch to a higher zone before the final 10 minutes to try to kill a boss with better drops.
For example, you can farm comfortably and then move to TOI 5-9 or TOI 10-12 before the boss appears. If you can kill it, you may get better rewards.
Can you do it? Yes. Should you always do it? No.
If you cannot kill the boss, you lose the drop and probably waste part of the instance’s value. Do it only if you are sure your character can complete that fight.
On some private servers, scrolls are sold that double the Training duration for 24 hours. This can allow a Training session to go from 1 hour to 2 hours. If you also use Extra Pass, you can chain even more farming time inside a closed zone, without PvP and without anyone bothering you.
If you do it smartly, you may even take advantage of the buff across two days. For example, if you buy it at 8 p.m., do your hours that day, and then enter again before 8 p.m. the next day, the effect may still be active, depending on how your server has configured it.
Labyrinth of Kastia

Here we need to add an important nuance: Labyrinth of Kastia is not a universal base feature of Lineage 2 Essence. Not all servers have it active, and depending on the version or private server where you play, it may appear modified.
If your server has it available, it usually works as a daily instance where you choose a difficulty based on your level and progress by clearing waves of monsters.
| Element | Information |
|---|---|
| Content type | Daily instance |
| Availability | Depends on the server |
| Main mechanic | Clear waves of monsters |
| Progression | 6 waves |
| Final stage | Mini raid or final boss |
| Objective | Gain experience and drops |
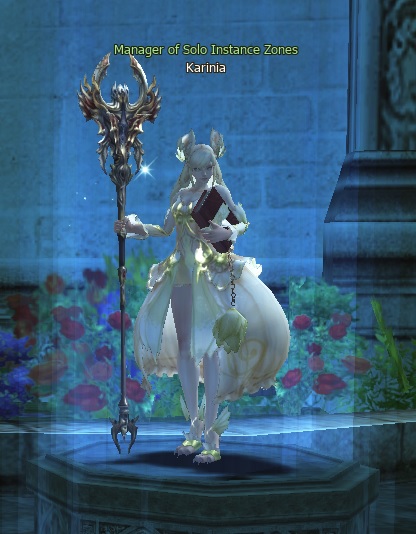
To enter, you must speak to the NPC in Aden named Karinia.
The mechanic is not complicated: enter, choose the difficulty that matches your character, clear the waves, and finish off the final boss.
The value of Kastia is that it is usually a quick, direct, and useful instance for gaining extra experience or additional rewards without depending on a complex mechanic.
That said, do not treat it as mandatory Essence content on every server. If it appears on your server, take advantage of it. If it does not appear, it does not mean you are missing something: that version may simply not have it implemented.
Party instances
Party instances require a different mindset. Here you are not just entering to hit monsters on auto-pilot. You need a minimum level of order, a functional party, and a clear idea of what you are trying to get.
Many players say an instance is not worth doing when the real problem was entering without a proper group, without enough damage, or without understanding the mechanic.
Dream Dungeon
| Element | Information |
|---|---|
| Instance type | Party or Command Channel |
| Entry NPC | Dream Priestess |
| Location | Aden |
| Required level | 76+ |
| Number of players | 2 to 10 |
| Reset | Wednesday 6:30 a.m. |
| Possible zones | 4 random zones |
You enter Dream Dungeon by speaking with the Dream Priestess in Aden. It requires level 76+ and allows 2 to 10 characters to enter, either in a party or command channel.
It is a weekly instance. Its reset is on Wednesday at 6:30 a.m., server time.
In the official version, when you enter, you do not always go to the same place. The instance can send you randomly to one of several zones.
| Possible zone |
|---|
| Gustav’s Manor |
| Benedict’s Monastery |
| Ventus’ Temple |
| Draconid Fortress |
On many private servers, this can be modified. If on your server you almost always enter Gustav’s Manor, you are not necessarily doing anything wrong. The server may simply have it configured that way.
Inside each zone, normal monsters and two possible bosses can appear. Bosses may appear with a certain probability, so you will not always see exactly the same boss or get the same reward.
| Zone | Main boss | Secondary boss |
|---|---|---|
| Gustav’s Manor | Gustav | Gustav’s Steward |
| Benedict’s Monastery | Gabrielle | Gabrielle’s Minion |
| Ventus’ Temple | Ventus | Rekario |
| Draconid Fortress | Tiat | Baint |
| Cat Guild’s Lair | Feline King | Feline Queen |
In Gustav’s Manor, one of the most common zones on many private servers, the logic is usually simple. You can clear all mobs, or go directly for the captains. You will usually recognize them because they have a green title.
When you kill 4 captains, the next step activates. You enter the manor, speak with the toy horse, and the boss appears.
Dream Dungeon rewards
Main bosses can give better rewards, although this depends heavily on the version and server where you play. Secondary bosses usually have a smaller drop table.
| Bosses | Possible drops |
|---|---|
| Gustav, Gabrielle, Ventus, Tiat, Feline King | Top-grade A-grade Weapon/Armor, Scroll: Enchant A-grade Weapon/Armor, Cloth Piece |
| Gustav’s Steward, Gabrielle’s Minion, Rekario, Baint, Feline Queen | Top-grade A-grade Weapon/Armor, Cloth Piece |
Also, Dream Dungeon monsters can drop special rewards depending on the zone.
| Zone | Possible special reward |
|---|---|
| Gustav’s Manor | Enchant Kit: Circlet of Hero |
| Benedict’s Monastery | Dragon Belt Pack |
| Ventus’ Temple | Package: Cloak of Protection |
| Draconid Fortress | Scroll: Enchant A-grade Weapon, Scroll: Enchant A-grade Armor, Aden’s Soul Crystal Lv. 1 – Armor |
| Cat Guild’s Lair | Einhasad’s Pendant Lv. 1 |
Cat Guild’s Lair
After clearing Dream Dungeon, there is a chance that a secret zone called Cat Guild’s Lair will open.
| Element | Information |
|---|---|
| Zone type | Secret zone |
| How it appears | With a certain probability after clearing Dream Dungeon |
| Main boss | Feline King |
| Secondary boss | Feline Queen |
| Possible special reward | Einhasad’s Pendant Lv. 1 |
Cat Guild’s Lair is basically an extra zone. You enter, clear more mobs, and can fight Feline King or Feline Queen. But do not treat it as guaranteed: if it appears, great; if it does not, it is not a bug.
Party Training
Party Training works similarly to Training Zone, but it is designed for group entry.
| Element | Information |
|---|---|
| Content type | Party instance |
| Entry | Special Hunting Zones |
| Required level | 76+ |
| Requirement | Party of at least 3 characters |
| Cost | Special ticket |
| Duration | 60 minutes |
| Daily entry | 1 |
| Repeat entry | Extra Pass |
It is a good farming option if you have a party, especially because it allows you to farm in a closed zone without PvP. As always, its real value depends on your server configuration, your damage, and whether the group can properly use the full hour.
Clan or command channel instances
In this section, we enter content that usually requires a clan, command channel, organization, and a group that is not improvising.
This includes content such as Clan Arena, Dwelling of Spirits, Frintezza, Fafurion, and, on some servers, Lindvior.
Clan Arena
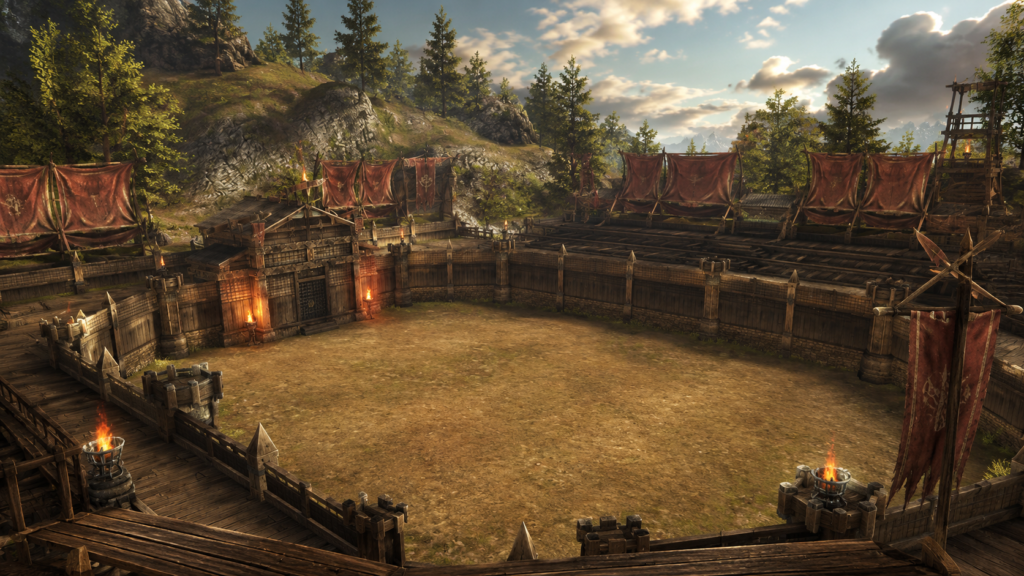
Clan Arena is a clan instance where your clan tests how strong it really is. It is not just a room to kill mobs: it is a level-based progression system that improves the clan and can provide useful rewards.
You enter in Aden by speaking with Doombringer Chief Koldrut Jay. To enter, you need to be in a command channel with members of your clan.
| Element | Information |
|---|---|
| Instance type | Clan |
| Entry | Doombringer Chief Koldrut Jay |
| Location | Aden |
| Requirement | Command Channel with clan members |
| Maximum characters | Up to 40 |
| Base duration | 30 minutes |
| Total levels | 25 |
| Progression | Saved by clan |
The group has 30 minutes to progress inside the arena. If more time is needed, the group can pay 1,000,000 adena to the Arena Machine to extend the attempt.
It can be extended up to 5 times. Each payment normally adds between 1 and 3 minutes, although very rarely it may add 5.
Clan Arena has 25 levels. Each level ends with a boss, but in one attempt you can only complete up to 4 levels. The important part is that clan progression is saved, so the clan does not always start from zero.
To begin, you interact with the Arena Machine, the timer appears, and the fight starts. You clear mobs, defeat the boss of the level, and when the boss dies, supplies appear inside the arena.
Each character level 40 or higher can collect one reward. But pay attention: you only have 1 minute to pick it up. During that minute, the timer stops, but if someone is not paying attention, the supplies disappear and the next wave appears.
Arena Supplies rewards
| Arena level | Guaranteed reward | Random reward |
|---|---|---|
| 1-5 | Battle Box Lv. 1 x1 | Blood Crystal or Scroll: PK |
| 6-10 | Battle Box Lv. 2 x1 | Blood Crystal or Scroll: PK |
| 11-15 | Battle Box Lv. 3 x1 | Blood Crystal or Scroll: PK |
| 16-20 | Battle Box Lv. 4 x1 | Blood Crystal or Scroll: PK |
| 21-25 | Battle Box Lv. 4 x2 or Valor Pack x1 | Blood Crystal or Scroll: PK |
Bosses by level in Clan Arena
| Level | Boss | Level | Boss | Level | Boss |
|---|---|---|---|---|---|
| 1 | Kutis | 10 | Varkan | 19 | Kosnak |
| 2 | Garan | 11 | Ketran | 20 | Garaki |
| 3 | Batur | 12 | Death Lord Likan | 21 | Shadai |
| 4 | Venir | 13 | Anbarad | 22 | Turabait |
| 5 | Oel | 14 | Baranos | 23 | Tier |
| 6 | Taranka | 15 | Takuran | 24 | Cherkia |
| 7 | Kasha | 16 | Nast | 25 | Spicula |
| 8 | Dorak | 17 | Keltar | ||
| 9 | Turan | 18 | Satur |
You do not need to memorize every boss name. What matters is understanding that Clan Arena is a progression ladder. The higher your clan gets, the better the rewards and benefits become.
Clan’s Exuberance
Clan Arena also unlocks and upgrades a clan skill called Clan’s Exuberance. It is obtained by killing the level 5 boss and improves when the clan clears levels 10, 15, 20, and 25.
| Skill level | Unlocked by clearing | Effects |
|---|---|---|
| Lv. 1 | Level 5 | HP/MP/CP Recovery Rate +4%, Acquired XP/SP +5%, Sayha’s Grace Consumption -5% |
| Lv. 2 | Level 10 | HP/MP/CP Recovery Rate +8%, Acquired XP/SP +5%, Sayha’s Grace Consumption -8% |
| Lv. 3 | Level 15 | HP/MP/CP Recovery Rate +12%, Acquired XP/SP +10%, Sayha’s Grace Consumption -15% |
| Lv. 4 | Level 20 | HP/MP/CP Recovery Rate +20%, Acquired XP/SP +20%, Acquired Attribute XP +15%, Sayha’s Grace Consumption -20% |
| Lv. 5 | Level 25 | HP/MP/CP Recovery Rate +30%, Acquired XP/SP +30%, Acquired Attribute XP +20%, Sayha’s Grace Consumption -20%, Stun/Fear/Paralysis Atk. Rate +5% |
This skill gives HP, MP, and CP recovery, more experience, reduced Sayha consumption, and, at higher levels, Attribute XP and bonus attack rate for Stun, Fear, and Paralysis.
That is why Clan Arena is not filler content. It is real clan progression. If your clan is active, this instance should be done properly, because you are not only looking for individual rewards: you are improving the overall power of the clan.
Dwelling of Spirits
| Element | Information |
|---|---|
| Instance type | Command Channel |
| Entry NPC | Parme |
| Location | Aden Square |
| Required level | 76+ |
| Number of players | 20 to 100 |
| Duration | 30 minutes |
| Reset | Wednesday 6:30 a.m., server time |
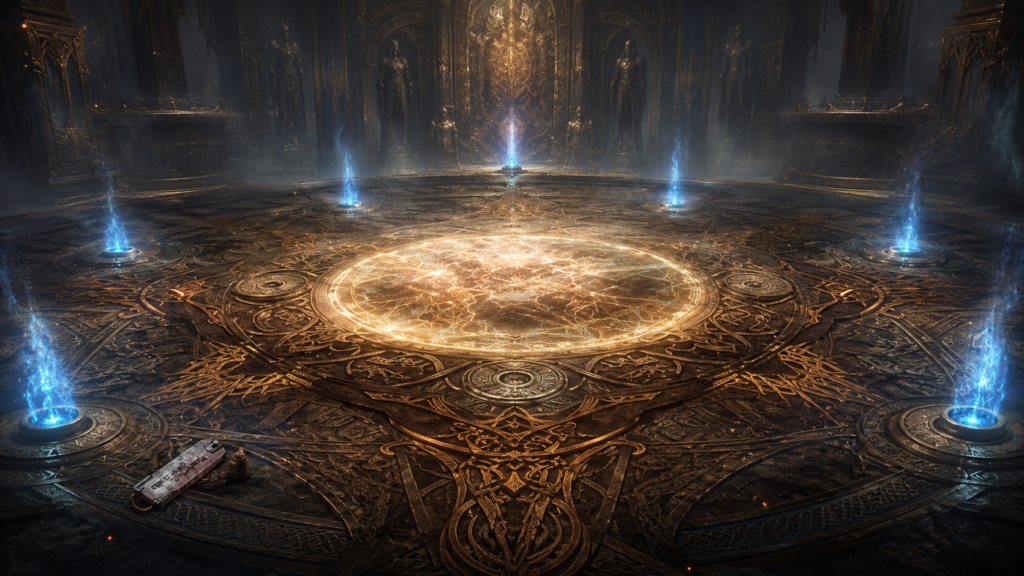
Dwelling of Spirits is a command channel instance designed for clans or large groups. Everything here revolves around the Spirit Rulers.
You enter by speaking with Parme in Aden Square. It requires level 76+, a command channel, and allows between 20 and 100 characters to enter.
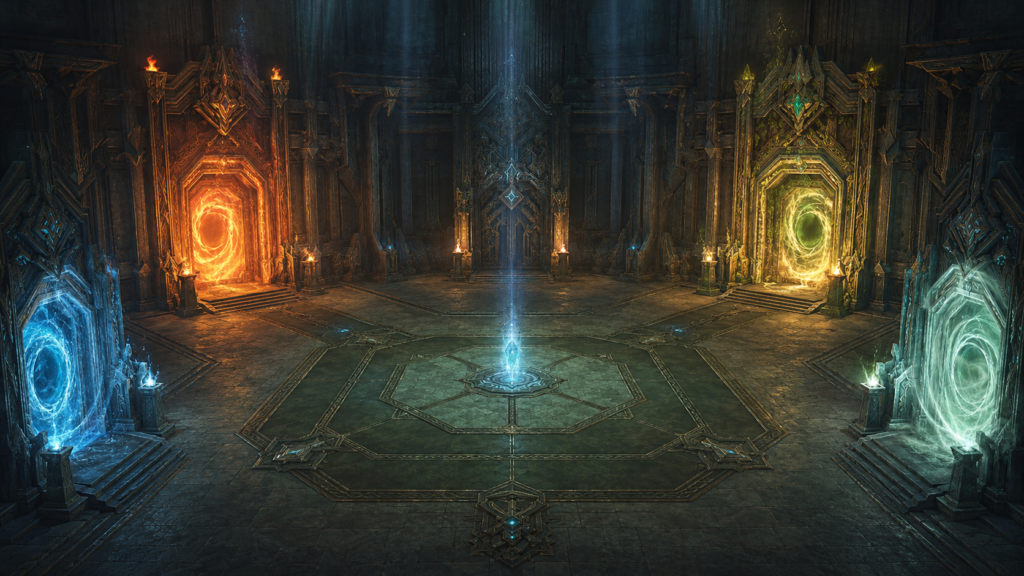
When you enter, you appear in a main room with four portals. At first, those portals are closed, so you cannot go directly to the boss you want. First, you must activate the fight by speaking with the Seal Stone.
When you interact with the Seal Stone, monsters begin to appear in the main room and the timer appears at the top of the screen.
| Monster | Level |
|---|---|
| Corrupted Fairy | 80 |
| Ruip Corrupted Fairy Captain | 80 |
| Small Chest | 80 |
The logic of the instance is to clear the monsters in the main room to activate a random portal. You enter the portal, fight the corresponding Spirit Ruler, kill it, return to the main room, and repeat until all four bosses are defeated.
When you defeat all four, you can leave by speaking with Animael. If you do not, the instance remains open until the timer runs out.
| Spirit Ruler | Element |
|---|---|
| King Ignis | Fire |
| Queen Nebula | Water |
| King Procella | Wind |
| King Petram | Earth |
The key to Dwelling of Spirits is not falling asleep in the main room. You cannot have half the raid hitting on auto while three people do everything.
The goal is to clear fast, open a portal, kill the boss, return, and repeat. The faster you clear, the better your chances of completing all four bosses in one entry.
Procella can be annoying because of tornadoes and crowd control, so avoid them as much as possible. Petram can become complicated when he puts up a shield: at that point, you need to kill his copies to break the mechanic. Ignis and Nebula usually feel more direct, but that does not mean you can go in without order.
Dwelling of Spirits missions
Inside Dwelling of Spirits, there are also weekly clan missions per character. This matters because you are not only entering for boss drops; you are also entering for clan progression.
| Mission | Type | Level | Objective | Reward |
|---|---|---|---|---|
| Dwelling of Spirits | Weekly, character | 76-99 | Kill 50 Corrupted Fairies and Ruip | Improved Fire/Water/Wind/Earth Attack Potion x5, 250 Clan XP |
| Spirit Rulers | Weekly, character | 76-99 | Kill at least 1 Spirit Ruler | Improved Fire/Water/Wind/Earth Attack Potion x5, 500 Clan XP |
Dwelling of Spirits drops
| Content | Possible drops |
|---|---|
| Spirit Rulers | Dyes |
| Spirit Rulers | Evolution Stones |
| Spirit Rulers | Necklace of Spirits |
| Spirit Rulers | Scroll to enchant Necklace of Spirits |
Frintezza
| Element | Information |
|---|---|
| Instance type | Party or Command Channel |
| Number of characters | 2 to 100 |
| Required level | 80+ |
| Main boss | Scarlet van Halisha |
| Zone | Clan Raid – Frintezza |
| Important reward | Frintezza’s Necklace |
Frintezza is a party or command channel instance. It requires level 80+ and allows 2 to 100 characters to enter.
The entry is activated by the party or command channel leader in Aden, by speaking with Parme. Once inside, you do not go directly to the boss. First, you must progress through several rooms.
| Phase | What happens |
|---|---|
| Entry | The party or command channel enters |
| First room | Monsters appear |
| Progression | Waves are cleared to open doors |
| Next room | More enemies appear |
| Final room | The Frintezza scene begins |
In the previous rooms, monsters such as Hall Guard Commandant and Hall Keeper Wizard appear.
| Monster | Level |
|---|---|
| Hall Guard Commandant | 85 |
| Hall Keeper Wizard | 85 |
When you reach the final room, you wait for the scene to activate. Frintezza appears playing the organ, and that is when the real fight against Scarlet van Halisha begins.
Here, an important misconception needs to be corrected: you do not have to kill Frintezza directly. Frintezza acts as support from the organ. The boss you must defeat is Scarlet van Halisha.
During the fight, Frintezza’s melodies can affect the battle. He can debuff the raid or buff Scarlet van Halisha. So if the fight suddenly feels strange, it is not always because your party is full of noobs. Well, sometimes it is. But in this case, there is also a mechanic.
There are also paintings or Evil Spirits in the room. Demons or adds can come out from those areas and disturb the fight. That is why some groups leave players controlling those zones to prevent demons from reaching the main group.
If nobody controls anything and everyone stays glued to the boss like soulless NPCs, the room can fill with mobs and the fight becomes more annoying than necessary.
In some versions, Scarlet van Halisha has several phases. After taking enough damage, the fight can change, the boss may transform, and pressure on the raid increases.
In Essence, this instance has been modified depending on version and server, so it is not a good idea to present one universal mechanic as if every server had it exactly the same way.
Fafurion’s Nest
| Element | Information |
|---|---|
| Content type | World raid / command channel |
| Entry | Parme / Special Zones UI, depending on version |
| Main boss | Fafurion Water Dragon |
| Main mechanic | Phases based on HP percentage |
| Special reward | Fafurion’s Treasure Chest |
| Key point | It is not just hitting the boss |
Fafurion’s Nest is a raid focused on Fafurion Water Dragon. In many versions, you enter by speaking with Parme in Aden Square, although depending on the server it may also be linked to Special Zones menus.
It usually requires level 76+, a command channel, and is designed for large groups.
The correct way to understand Fafurion’s Nest is this: you enter the zone, the fight against Fafurion Water Dragon begins, the boss loses HP, and depending on its HP percentage, mechanics activate.
One of these mechanics can be the appearance of additional dragons. If the group does not have enough damage or control, a tank is usually used to aggro those dragons and run them in circles away from Fafurion. Many times, a healer goes with the tank to keep them alive.
Fafurion also has special attacks. Some can be dodged because they leave marks on the ground, but others, like Fear, can be very annoying if the group’s debuff resistance is not good enough.
If your group is very strong, the strategy may be much simpler: enter, hit, and melt the boss. But when damage is not excessive, mechanics matter a lot more.
Defeating Fafurion can complete a weekly mission and can also drop tradeable items useful for improving your character or selling them.
Lindvior
Lindvior may not be available as official content in every version of Essence, but some private servers enable it as an additional raid.
If your server has it active, it usually works similarly to Fafurion: you enter a room, face the boss, and look for drops.
Its most recognizable mechanic is that it can fly up and crash down with an area attack that applies stun. Avoiding it can be difficult because the movement is usually fast.
Unlike Fafurion, it may not complete a weekly mission if your server does not have one implemented. In that case, the main value is the drop.
Important warnings before entering instances
In some party or command channel instances, certain servers allow you to enter by paying adena for each missing group slot. That may let you enter alone, but it does not mean you should.
If you are not actually strong enough, you can pay the entry, enter alone, and lose the instance. Being able to enter solo does not mean the content was designed to be completed solo.
You should also keep in mind that, on private servers, some content may lose relevance depending on the server’s progression and your character’s power.
For example, there may come a point where Transcendent or Training are no longer very interesting for experience, and you may prefer to buy the mission with tickets or spend that time on more profitable content elsewhere.
In the case of raids like Frintezza, Fafurion, or Lindvior, you may eventually enter mostly for drops, either to improve your character or to sell valuable items.
Which instances should you prioritize?
If you are starting out or mostly play solo, your priority should be making good use of solo instances. Transcendent Instance Zones help with experience at low and mid levels, while Training Zone can give you one safe hour of farming without PvP.
If you already have a party, Dream Dungeon and Party Training start gaining value, especially if your group can complete them quickly and obtain useful rewards.
If you are in an active clan, Clan Arena and Dwelling of Spirits are much more important than they may seem, because they do not only give individual rewards: they also push clan progression.
And if your group has enough power, raids like Frintezza and Fafurion can become key content for chasing important drops.
| Player situation | Recommended priority | Reason |
|---|---|---|
| Solo or casual player | Transcendent Instance Zones, Training Zone, Labyrinth of Kastia if available | Progression without depending on party or clan |
| Player with a small party | Dream Dungeon, Party Training | Better use of group rewards |
| Player with an active clan | Clan Arena, Dwelling of Spirits | Clan progression, missions, and collective rewards |
| Strong or competitive group | Frintezza, Fafurion, Lindvior if available | Important drops and raid content |
Conclusion
At first, the instance system in Lineage 2 Essence can feel confusing. But the problem is not that there is too much content: the problem is not having it organized.
Once you understand the difference between solo instances, party instances, and clan or raid instances, everything starts making more sense.
Now you know what content you can do on your own, what requires a party, what requires a clan, and which instances should be seen as sources of experience, progression, drops, or collective improvement.
And when you understand which instance is worth doing, when it is worth doing, and what mindset you should bring into it, you stop playing blindly and start using your time much better.
If after this guide you still enter instances without knowing what they are for, that is no longer my fault.
More Lineage 2 Essence guides
If you want to keep learning about Lineage 2 Essence, check the progression, enchantment, soul crystal, class, special zone, and upgrade system guides on gvrplay.com.